July 18, 2011

The Easiest Tomato Sauce You'll Ever Love

Even if you've never picked up a knife...you can make your own tomato sauce. I promise. Because this sauce involves no dicing or cutting. You literally just throw it together.

The biggest factor that will sway the outcome of this sauce is the quality of tomatoes. If your not growing them yourself, or don't know someone who is, I highly recommend you hit up your local farmer's market. There are tons of markets in the Central Texas area, and if you are in Austin, I consider you to be farmer's-market-spoiled, because there are tons. Get out there and buy some GOOD tomatoes. Ones from your traditional supermarket pail in comparison. They are bland, mealy and never allowed to ripen on the vine. HOWEVER, if you absolutely must use icky store-bought tomatoes, you will still have a delicious tomato sauce that triumphs over any bottled/canned pre-made crap you get from a shelf.

Oven-Roasted Tomato Sauce


  • 2-3 lbs tomatoes, depending on your preference. Use a mixture of tomatoes (cherry, roma, slicing tomatoes) for a well-rounded sauce. You can core the tomatoes or leave them whole.
  • 1 large onion, quartered
  • 6-12 cloves garlic, once again depending on your preference. Crush them with the flat side of a knife, (this way, they will be easier to peel later)
  • 2 sprigs fresh oregano, thyme, or both. If you don't have it fresh, substitute 1 tsp. dried.
  • Peppers - a jalapeno if you want to add some spice, a bell pepper, or both
  • 1/3 cup olive oil
  • Salt and pepper, about 1 tsp. each, more to taste.
(As you can see, it is totally up to you on proportions here...experiment, have fun with it!)

1. Preheat oven to 400 degrees.

2. Combine all ingredients in an oven proof dish.

3. Bake for 30 minutes. Remove from oven to stir, and place back in oven. Bake another 30 minutes and remove from the oven.

4. Let it cool for ten minutes or so. Remove garlic wrappers. Puree all ingredients in a blender or food processor, or place the ingredients in a bowl and use an immersion blender (depending on which blending equipment you have).

You're done! Season with more salt if desired. If the sauce is too thick, add a little chicken brother or water to thin it out.

This sauce is great for pasta of course, but super awesome on pizza as well. You could even add a cup or more of chicken/vegetable stock and have it as a soup. I like to double the recipe so I can freeze half and use it some other day when I don't have time to cook. While the sauce is cooking, you can boil noodles, make pizza dough, saute veggies/meat to add to the sauce, etc., to save time.

April 24, 2011

Eat a BUG: Have a Crawfish Boil!

Crawfish, crayfish, crawdads, mud bugs...they are all the same delicious freshwater creature, prized for their tail meat and succulent head juices! Besides just tasting good, boiling crawfish is an event in itself, accompanied by plenty of beer, good company, and great times.


Where to Get 'Em (and how many pounds?)
The crawfish season begins in February and lasts until June, with mid-April to early May being the peak time, when prices are the cheapest. Just remember, cheaper isn't always better! Quality is also very important when buying these little critters. Either take my advice, or do your own research, but either way, don't just buy the cheapest ones you can find.

There's quite a few options for buying live crawfish. Many suppliers out of Louisiana will ship them to you via Fed Ex, and you can pick them up at your local airport, or pay extra and have them delivered to your door. A simple google search for "live crawfish" will turn up a number of these kind of suppliers, and though I haven't ordered this way myself, upon doing my research I never came across anything negative.

Some local grocery stores will either have them in stock, or order them for you depending on how much you need. In the Austin area, I have heard great things about Austin Quality Seafood, Sambet's, and Austin Seafood Supply. Fiesta traditionally sells them the cheapest, but general consensus amongst reviewers is that they are small and half are dead. There are also a few individuals that make runs to Louisiana weekly and bring the bounty back to the Central Texas area. One guy that does this operates under the business name Single Barrel Crawfish. His reviews were good, his prices were amongst the best I came across, and he sells at the Barton Creek Farmer's Market. He has a Facebook page with a phone number and was a really pleasant person. However, I got mine from HEB so that I didn't have to drive to Austin, and I was very satisfied! They were medium to large, and out of 100 lbs, 98% were alive.

When you call around for prices, know that market price changes every week. Make sure the quote you are getting is for the week you plan on buying them. If you plan to have your party on a weekend, order them by Tuesday or Wednesday. Make sure you ask the supplier about size (the larger the better...no one likes small crawfish; it's not worth the work!) and about their return policy. Some places will guarantee your money back for dead weight...just be sure to set the dead ones aside if there's a substantial amount of them.

So how much do you order? For heavy crawfish eaters, aka coon asses, estimate about 4 lbs per person. If you are trying to stretch your dollar, it's safe to assume 2 lbs/person. Depends on your crowd, really.

Purging...Not Just for Bulimics!
Keep your crawfish on ice once you have them. They should be kept between 35 and 50 degrees. If you have a smaller amount, this can be done in a large ice chest or two. With our 100lbs, we had to use our tub, with a tarp draped over it to keep the cool air in. And we also had to close the bathroom door to prevent them from escaping!

Crawfish are also referred to as MUD BUGS...meaning, they are not clean! They need to be "purged". This basically means rinsing them in tap water. The tap water causes them to "get rid" of the impurities inside of them; neglecting this process greatly affects the taste...in a bad way. I've never tasted an unpurged crawfish, but apparently I don't ever want to.

To purge, you can use an ice chest that drains, or a plastic kiddie pool. We poked holes in one side of the pool to make draining easier. When you're ready to boil a batch of the bugs, put them in the pool, and cover them with tap water. The water will get muddy. Let them sit for 5 minutes, then drain. Repeat this process until the water runs clear. DO THIS IN AN AREA THAT YOU DON'T MIND GETTING MUDDY. Far enough from where people are hanging out so that your guests don't step through mud.


I had some help with the purging process, as you can see...

Now, some die hard crawfish boilers swear that by dumping a pound of salt in the water, it makes the bugs cleaner. Others say that it just causes them to die (by the way, don't cook a dead crawfish! throw them out.) For our first few batches, we purged them in regular tap water until the water turned clear, and then threw in salt to see if it made a difference. It didn't. So we skipped the salt, and you know what? We had some damn good crawfish! So I would say, don't use salt.

What Goes into the Pot
The traditional crawfish boil not only has crawfish, but corn, potatoes, mushrooms, sausage, you name it, in the pot as well. Anything that you throw in will be delicious, and it will double the amount of food, so if you have a rather large party, it's a perfect way to stretch the food.

There are many seafood boil seasonings on the market, and I haven't heard anything negative about any of them, so go with what you can find. We used Slap Ya Mama Seafood Boil and it was awesome. Bring your water to a boil, add the seasoning, and let it boil for about 20 minutes.

Potatoes, sausage, and mushrooms went in first, and we let them boil for about 10 minutes. Then the crawfish and corn went in. Cover, let boil for 3-5 minutes, then turn off the heat. Let it sit for 20-30 minutes. Supposedly, when the crawfish sink, you know it's ready.

By this point, most of the crawfish were sunken. Time to eat!!!
 

Crawfish Boil Etiquette
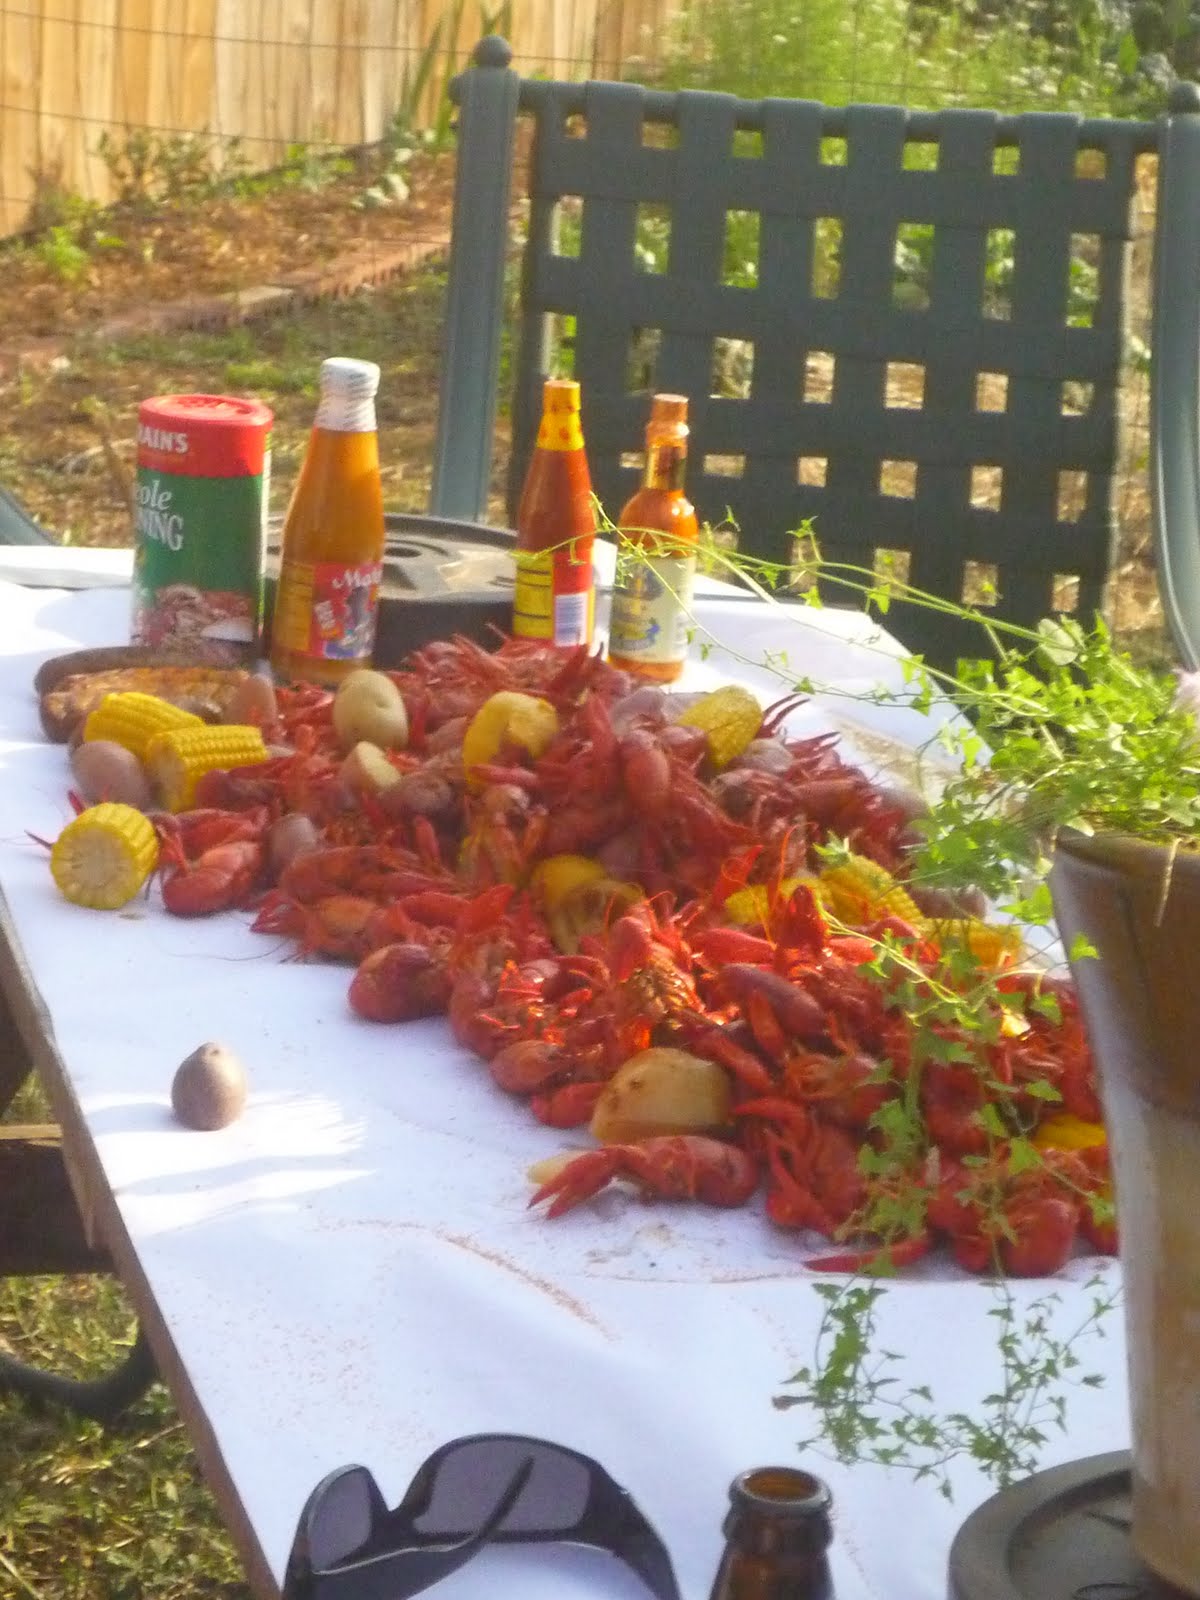
Throw some butcher paper or newspapers onto a picnic table, and dump the good stuff onto the table. Provide plenty of paper towels, and trashcans.


A friend of mine from Louisiana told me that it's custom to ask your guests for $5 per head, to help out with the cost of the boil. She lives in Austin now, and said that since the price of crawfish here in Central Texas is twice as much as in Louisiana, she would ask her guests here for $10. I left it up to the guests, and most people were honest. In the future, I might make them donate at the door, since I'm positive that some of the uninvited guests did not contribute (or they would say "Oh, I'm not eating," but later, after a few beers, I would see them digging into a pile of crawfish.) It also helped to have a friend go around with the donation box. For those who contributed to the party in some way, I didn't mind if they didn't donate. For example, the people we borrowed the boilers and propane tanks from, or if someone brought dessert, or a case of beer (to SHARE...not if they drink it all with their group of friends), I didn't ask them for an additional donation.

Start off small with a group of 10-15 people. It's a great way to spend a late spring evening...with good food, great friends, and cold beer. Good luck, and feel free to ask if you have any questions!

April 23, 2011

Buona Pasqua, with Italian Easter Bread

Please pardon me for my lack of writings! With the amount of garden space we're challenging ourselves with this year (3 roughly 20'x20' spaces!), the plethora of springtime events going on, plus 9 chickens, and two jobs, things are just too hectic around here to even finish a thought. I do have a few posts up my sleeves though....

This one is extremely appropriate for this weekend! This traditional Italian Easter bread is sweet, simple, and fun to make, especially if you have kids (there is egg dyeing involved!) No plants are involved, but fresh eggs sure are.

Growing up in an food-traditional Italian family, I thought I would have come across this one before, but today was the first time I have seen/heard of/made this beautiful, festive, sweet bread. My mom, who grew up in an upstate NY town with a large Italian community, recalls that every year, someone would make this bread, whether it be an aunt, an friend's aunt, or an aunt's friend...it would always show up on the Easter table, along with copius amount of other breads, cakes, or pies, to celebrate the end of Lent. Since Lent is a time of sacrifice, when it's over, it sure is over! Though there's no digging in until after Easter Mass.


Italian Easter Bread
The bread can be made as one large "wreath" to colorfully adorn the center of the table, or it can be made into six small breads, to be given away as presents. This recipe came from the blog, The Italian Dish, with me and my mom's own added input, comments, and suggestions that we came up with while actually making it. Buona fortuna!

For the dough:
1 package Rapid Rise (instant) yeast, about 2-1/4 teaspoons
1 1/4 cups milk
1/3 cup butter
2 eggs, beaten
1/2 cup sugar
3 1/2 cups flour
1 tsp anise - we added this according to my mom's childhood memory. it can be left out.. but you may be  missing out :)
pinch of salt

You will also need:
1 egg, beaten with 1 teaspoon of water
6 dyed Easter eggs *
sprinkles or pearl sugar

*You can dye the eggs first, or dye them while you are waiting for the dought to rise. The traditional way is not to hardboil them, though...they are supposed to cook in the oven along with the bread. However, I did boil them for a few seconds (don't tell Grandma!). We were afraid they would crack when being dyed, going from refridgerator-cold to dye-hot water (dyeing them works best in very hot water). Have fun dyeing them! Be creative, mix the dyes, make new colors!


Take them out of the dye and pat them to remove excess liquid, and let them sit out to dry. Admire them :) 


Making the dough:
In a small saucepan, warm the milk and butter together, just till butter melts.    In a large mixer bowl, combine yeast, salt, eggs and sugar.  Add the warm (not hot - it will kill the yeast) milk and butter. Add about half the flour and the anise and beat until smooth with dough hook (or just use any utensils you feel necessary to slowly incorporate the flour - wooden spoon or fork).   Slowly add the remaining flour to form a stiff dough.  Don't worry about how much flour it ends up being, just keep adding until the dough is not sticky anymore - we added about another 1/2 cup to a cup.  Knead until smooth with either dough hook attachment or turn out on floured board and knead.  Place in a greased bowl, cover and let rise in a warm place until doubled, about an hour.

Punch dough down, divide into 2 pieces (or 12 if you are making 6 breads).  Roll each piece to form a 1 inch thick rope about 24 inches (14 inches if you're making 6 breads) long and, taking two pieces, twist to form a "braid", pinching the ends, and loop into a circle. If at any point things are getting sticky, just sprinkle flour onto your work surface. Place the finish twisted product on a baking sheet lined with parchment paper.


(Mom held while I twisted)

and....

Good enough! right?


Now, tuck the eggs into the folds. Cover again and let it rise for another hour.
When it's done rising, brush it with the beaten egg/water mixture, and cover with sprinkles!


Bake at 350 for 40 minutes if you are making one bread, or for 20 minutes if you are making the 6 breads. You can eat the eggs, but if you leave the bread sitting out for a few hours, don't eat them. Duh.

In case you were wondering, the egg mixture that you brush over the bread causes it to brown. Some people desire the brown color, some don't. If you don't like it this brown, just beat the egg white with the water(separate the yolk out).


Happy Easter from us....eat well!!!!
Buona Pasqua da noi ... mangiare bene!


March 10, 2011

Greens and Beans, and Other Things

I hope you've all been as busy as I've been...now is the best time to be working in your garden! First of all, the weather is GORGEOUS, so even if you're not working in the garden, just get outside! Warm weather veggies should planted soon, although some you can plant throughout June. Also, there's many spring and cooler-weather veggies that are thriving right now. One thing that I always have a plethora of, come spring time, is greens. Collards, kale, Swiss chard, spinach, mustard greens, and beet greens....all incredibly healthy, all easy to grow, all easy to to cook and enjoy! Before we get to the recipe, I must show a picture of our 9 newest additions to the pack...


So in six months, be expecting eggs to show up in all of my recipes! In fact, I've got a great egg curry dish that I just need to put some finishing touches on....

But back to greens! If I had to pick a favorite to rant about here, it would, hands down, be kale. Just like the other greens, it's nutritious as hell, but I really favor the texture, flavor, and cooking time. My favorite type of kale is dinosaur kale, or blue lacinato:


Growing Kale
I plant kale in spring and fall, and right now I have 20 plants, hoping that I will have enough to give some away this year. THAT'S how much I love it: 20 plants is barely enough!

One of the reasons I value it so much is because you harvest the outer leaves, and the plant keeps growing. In fact, it grows faster when you continuously harvest, producing new leaves to try and make up for the ones gone. With plenty of water and some shade, kale can appear on your dinner plate throughout the summer. With protection from hard freezes, it will bare through the winter. Supposedly it is even sweeter in the winter months after the first few light frosts, but it grows slower so it becomes more of a sporadic treat. Because it grows year round here (with a little care), I've had some plants last two years; out in the community garden I've seen some plants last longer.

Kale is easily transplanted or sown from seed, though if you are impatient you might be better off with transplants. Just like any transplant, make sure you keep an eye on its water level, and keep it happy to help reduce the stress from being transplanted. Stand back and watch it grow. Harvest when the outer leaves are big enough.

Bugs
I never have too much trouble with pests, although I've come across some chewed or holy leaves. Since I'm not selling my kale (yet!), I have no reason to lose sleep over a few holes and this problem usually goes away unsolved, UNLESS the culprits are:
  • harlequin bugs (squash 'em)
  • cabbage loopers (squeeze 'em)
  • or, aphids (hit 'em with the hose)
If you inspect your kale daily, or even every two days, some simple bug-squishing will take care of your pests. They won't become a problem unless you allow them to. Keep your plants healthy by keeping your garden healthy -- remove dead plants, compost regularly (which insures that the soil has all the nutrients the plant needs for a healthy immune system), and remove infested or diseased plants. If infestation does get to be a problem to where the plant is still salvageable but the bugs gotta go, your local nursery (or Google) can probably provide you with a few good resources to organically solve the problem.

Cooking with Kale
Kale is insanely nutritious, and pretty damn delicious. It shows up in a lot of soups, though boiling it for too long causes it to lose some of it's nutrients. Try it other ways, too: in stir-fries, baked until crispy (kale chips!), sauteed with garlic as a side dish, or even raw on a sandwich or in a salad (use the younger, more tender greens).

This recipe is my own twist on a traditional Spanish-style soup. I'm a huge fan of the simplicity of one-pot meals-- and this is one of my favorites.


Greens and Beans, and Other Things
  • 1 tablespoon olive oil
  • 1 package Spanish chorizo or andouille sausage, quartered (note: Spanish chorizo is similar to salami...it is NOT the same thing as Mexican chorizo. I usually find Spanish chorizo in the cheese section where the other salami-like sausages are)
  • 1 yellow or white onion, diced
  • 2 large potatoes, diced, preferably Russets or Yukons
  • 5 garlic cloves, minced
  • 1 tablespoon chopped fresh rosemary (Rosemary is all around you. If you don't have your own, don't waste your money buying it in the store. Chances are it's a landscape plant somewhere within a 1/4 mile radius from your house or place of work. I'm sure no one will mind you doing a little pruning to their bush. It also stores well in the freezer, so if you pick too much, put some away for next time! However, it is very easy to grow, and drought tolerant...so you could also grow your own for next time.)
  • 1 tablespoon Hungarian or Spanish paprika
  • 2 teaspoons smoked paprika
  • 1 tablespoon salt
  • 1-2 bunches of greens, or more! ...torn from the stems in about 2-inch pieces (kale is my favorite, but you can use what you have on hand: beet greens, chard, spinach, collards, etc.)
  • 1 can diced tomatoes
  • 1 can Northern, Navy, or Cannellini beans
  • 1 quart chicken broth
1. Heat oil in large pot on medium to medium high. Add sausage and brown, allowing the fat to render, giving you a nice, flavorful oil. Stir occasionally so that sausage is uniformly brown, for about 5-7 minutes. Remove with slotted spoon and set aside.

2. On medium heat, add potatoes and onions. Stir occasionally (don't fret if the potatoes stick to the bottom), for another 5-7 minutes.

3. Add garlic, rosemary, and paprika. Cook 2 more minutes. It's gonna smell GOOD.

4. Add salt, tomatoes, beans, and chicken broth. Bring to a boil, scraping up the pieces from the bottom.

5. Add sausage and greens, and reduce to a simmer. (If you decided to go with a lot of greens, you might have to add a few handfuls at a time until they cook down to make room.) Cover and let simmer for about 15 minutes or until greens are tender to your liking. If you prefer a little more liquid, you can add more chicken broth or some water to thin it out.

Adjust taste with salt if you please. Maybe add a dab of sherry or red wine vinegar if that intrigues you. Top with Parmesan and serve with some good rustic bread! Enjoy!


February 15, 2011

Papas!

Everyone loves potatoes! Even the pickiest of eaters will still eat a french fry. They are super easy to cook with and hard to mess up. Growing (and harvesting) them is also a simple pleasure.

Seed Potatoes and Prep
Potatoes are tubers, meaning they grow underground from the roots of the plant, and mature as the tops of the plant mature. Have you ever stored a potato for too long and noticed sprouts growing? You are witnessing the beginning growth stages of the potato plant.

To grow potatoes, you plant a certified "seed potato". You want to buy these from a garden supply store to ensure a disease-free crop, not from the grocery store, where potatoes are often treated with growth inhibitors and other chemicals to store longer.

Potatoes enjoy cooler spring-time weather, but don't like freezes, so here in Central Texas we have a short growing season. All this means for us is that we should plant "early" varieties...ones that mature faster. Any nursery you go to will likely carry Yukon Golds, Pontiacs, Red La Sodas, or Kennebecs, all of which will grow fine. This year, I got mine from Natural Gardener, which is quite the drive for San Martians. King Feed in Wimberley also has them. Get them now (this week) and you will be right on time!

Potatoes do take a very small amount of planning ahead, so get them as soon as possible. When you get your potatoes, they may already be sprouting, which is fine. Some gardeners prefer this "head start". Just handle with extra care to make you don't damage these sprouts. A few days before you plant, you want to cut your potatoes into golf ball sized pieces. Aim for two eyes on each piece. Small potatoes can be left as is. Leave them out on the counter to cure. The potato flesh will get kind of purplish and feel like a callous...which is normal. After 5-10 days, they should look something like this:


NOTE: Some say that potato pieces should be dusted with sulfur before curing, to prevent rot once planted. I've never done this. If rot is the only thing it prevents, just don't plant in wet soil, and don't plant them somewhere with crappy drainage. Try the sulfur method if you want, but if you prefer to go the cheaper route and skip that step, I think you'll be just fine.

Get 'R Dug! (and planted, and tended)
Hopefully you have already prepared a bed for them. If not, this is something you can do while you are waiting for them to cure. They aren't picky plants or heavy feeders, but they do need some compost love, so if you haven't added compost in a year or so, make sure to do this. If you are behind, don't fret too much, but you do want to aim at getting your potatoes in the ground by March.

Plant each potato piece, sprouting eyes up, 4-6 inches deep and about 12 inches apart. Different gardening resources will give you slightly different planting depths/spacing. Some say 6-8 inches deep, and 10-12 inches apart. Don't fret too much over this. You will still get your taters.

Don't get discouraged if it takes a little while for the shoots to emerge. Last year mine took three weeks. The new vegetation can be easily damaged by a hard freeze, so if we get some bitter temperatures after planting, make sure you protect them.

The coolest thing about potatoes is that they grow above the seed piece you planted. Some gardeners will continue to pile dirt on top of the plants as they grow, to increase production. I just cover them with a thick layer of mulch. It keeps them cooler and it's easier since I always have hay on hand. Plus there is some debate as to whether or not this is a beneficial practice for such a short season. Definitely mulch though.

I'm Hungry! When Can I Eat Them?!
Patience. While technically you can eat them anytime you feel they are big enough, it might be worth the wait to get larger potatoes. However, with any root crop, I get really antsy and just HAVE to dig a little and feel around. That suspense is the beauty of root crops...just be careful not to damage any roots/tubers when you do this.

Basically, you know they are ready when the tops start to turn yellow and die, because obviously they won't be growing anymore. Carefully dig them up. Set them outside, somewhere in the shade, or a shed that gets adequate airflow. A shady balcony would be good, if you live in an apartment. Let them sit for a few days to toughen up. If there any soft, shriveled ones, throw them out. Now they are ready to be scrubbed, cooked, eaten, sold, or given away to friends!

I don't need to include cooking ideas here, but once I get my harvest and am forced to come up with creative uses for potatoes, I'll throw some new ideas your way. In the meantime, enjoy getting dirty!

February 9, 2011

Roasted Winter Vegetables with Truffle Oil

This one is for Erin! I started this blog to share recipes with friends at work, and this one was in high demand. :)

But first, let's talk about a truffle oil!

It's the main flavor to this dish and pretty much any dish you add it to. It has a reputation for being an expensive ingredient, but you only need a small amount every time you use it, so it lasts forever.

So what is a truffle?! Well, it's a mushroom. It has been prized for centuries in almost any European cuisine. They are most often found by hunters using pigs or dogs to sniff them out. Both white and black truffles are used for culinary excellence. The difference, as far as I understand, is only based on where in Europe the specimen is found. Supposedly, blacks are less pungent than whites. They are all delicious. There is talk that truffle oil is only olive oil artificially flavored with truffle flavoring. Regardless, it's damn good and irreplaceable.

It is worth the trip to Central Market or some specialty grocery store to buy a bottle, but you can also buy it online. It will last you forever and you will never be able to match it to anything else you have ever tasted!

Besides using it in this recipe, you can try it with:
  • Mashed potatoes: make your favorite mashed potato recipe and add a few drops of truffle oil at the end. Top with grated Parmesan.
  • Steak: marinate a ribeye wtih balsamic vinegar and rosemary. Cook medium rare and top with a few drops of truffle oil.
  • Pasta: add a drizzle to a cream-based pasta sauce. Toss pasta with a few sauted mushrooms and the cream sauce. Add a sprinkle of parmesan.
Other things I have added it to are polenta, couscous, and veggies such as turnips and radishes.


This recipe is a basic guideline for using it with roasted veggies and can easily be changed, depending on what you have on hand. Enjoy :)
  • 2 quarts of winter veggies, such as Brussels sprouts, turnips, and radishes (the combination of these three veggies are my favorite...use them if you can!)
  • 10-ish white mushrooms, though creminis or shiitakes would be even better
  • 1/2 red onion
  • 1 head of garlic
  • 1/2 cup balsamic vinegar
  • 1/2 cup olive oil
  • 1 tbl salt
  • 1 tbl pepper
  • 1 tbl rosemary, chopped (can substitute thyme, tarragon, or oregano if you don't have rosemary).
  • Truffle oil, to taste

1. Preheat oven to 425.

2. Chop winter veggies, mushrooms, and onion into 1-inch pieces and place into a large bowl. (As you halve the Brussels sprouts, the outer leaves may fall off. Keep 'em! They get crispy and delicious in the oven.)

3. Separate head of garlic into individual cloves. Lightly crush cloves so that they peel easily. Add to bowl with the chopped veggies.

4. Add oil, vinegar, salt, pepper, and rosemary. Toss to combine.

5. Using two baking sheets, lay out veggies so that they fill the pan, but are not overcrowded. Definitely no more crowded than this:


6. Bake for 15 minutes, then toss them around to promote even browning. Return to oven and bake another 10 minutes. Drizzle truffle oil, and toss. Serve with freshly grated parmesan cheese, or not.

Variations:
While the Brussels sprout-turnip-radish trio is wonderful, you can easily make this recipe with just one kind of veggie.
Maybe truffle oil isn't a big hit in your family. While it drastically changes the dish, you can omit it and just drizzle the finished product with a little more balsamic vinegar and olive oil to keep it simple.

February 2, 2011

Cabbage and Sausage with Mustard Sauce

I love this recipe! Not only is it delicious, but it was one of those last minute creations where I found myself rummaging through refridgerator drawers, the freezer, pantry, and spice cabinet one evening, in search of something that I could just throw together without going to the grocery store. Because it was born in such a spastic way, it lends itself to alot of improvising and substitutions.

Vegetarian? Omit the sausage and just start at step #3.
You can make this an excellent side dish by using bacon instead of sausage.

  • 1 package smoked sausage, quartered (my favorite is Andouille, but any kind will work)
  • 1 small head of cabbage, chopped into 1-2 inch pieces
  • 1 bunch of radishes (optional. you could also use carrots or turnips...depending on what you have on hand. I think radishes work best. Or you can just keep it simple and not add another vegetable, if you just want the cabbage.)
  • Half an onion, halved, then sliced thinly
  • 4 garlic cloves, minced
  • 2 tablespoons unsalted butter
  • 1/2 cup mustard (preferrably dijon. if you have some fancy gourmet mustard, more power to ya)
  • 1 1/2 teaspoons sugar
  • 1 tablespoon caraway seeds
  • 1 cup chicken broth (or a lager beer!)
  • Chopped fresh dill, optional
  • Salt and pepper, to taste

1. Heat a large skillet on medium high (make sure the skillet has a lid...you will need it later!)

2. Add the sausage and render the fat until brown (about 7 minutes, stirring occasionally). Remove sausage with slotted spoon so that the fat remains in pan. Set the sausage aside for now.

3. Reduce heat to medium. Melt the butter.

4. Add onions, cook 3-4 minutes until soft.

5. Add garlic and caraway seeds, cook 1-2 minutes until fragrant.

6. Stir in mustard, sugar, and broth/beer until combined. Bring to a simmer on medium heat.

7. Add cabbage and radishes. Stir to combine. Cover and let simmer for ten minutes. Stir, then cover/simmer again for another 5-10 minutes until cabbage and radishes are tender. If you need a little more broth to keep simmering, add 1/4 or 1/3 cup more before covering it again.

Taste it now. Add salt and pepper to your liking. If you want a stronger mustard taste, add a little more! Do what you want. It's hard to mess up this dish!

Sprinkle with chopped dill and serve.